Friday 29 March 2013

Dina Wakley Art Journal classes - Boy did I have fun!

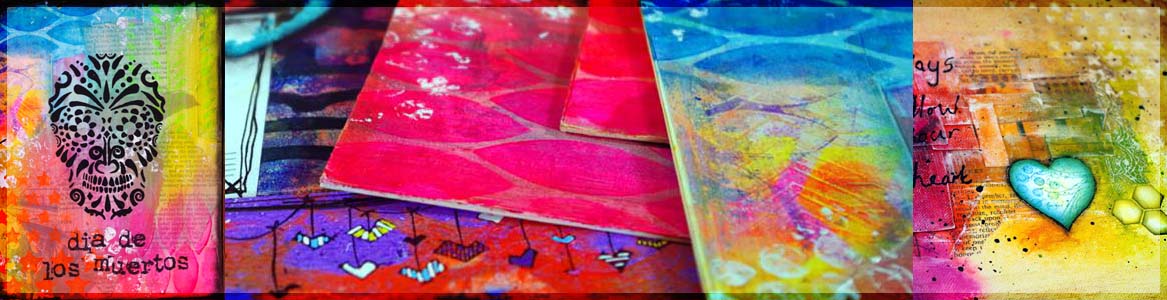
I took some Dina Wakley classes a couple of weeks ago at Art From The Heart and boy did I have fun. This was the Art Journal class called "Lots of Layers". It was fast paced and full on, I've never worked so quickly in my journal before. I usually think too much about what to do next, but had no time to do that here, we went with the materials and what you were feeling right then and moved on to another page quickly.
You really feel like you've flexed your arty muscles when you've finished, and it's virtually impossible to get all the paint, gel medium and ink off your hands! But's its well worth it when you look back at what you did.

This blog post is quite photo heavy so grab a cuppa and a biccy and take 5 perhaps. I'll try not to waffle though.

What is close to my heart?
Lots of texture on this one. We covered the page in moulding paste and painted over the top.


We had a sheet of paper that we added lots of Dylusions inks to with stencils, then cut out hearts or any shape.  My family is close to my heart.


River of music
We made a river of torn up music sheets across the page. Love those pink circles.


Music is a huge part of my life, it's just as important as playing with ink and paint.


Woke up on the wrong side of the bed today!
 Playing with paint, moulding paste and oil pastels.


Do I believe in me?
Ephemera everywhere, stuck down with gel medium, texture is my favourite thing in the world. I love having texture in art work, it gives it another dimension that makes you want to reach out and feel it too.


Can I draw faces?
Love the colour on this, blue, teal and purple are my favourite combination. Love that shot of orange too.


Love those stencils, even if they are caked in paint Dina!


Oh Betty!
We used the left over cut out of Betty (the Silhouette) and sprayed ink though a stencil inside her body. I love that shocking shot of pink!


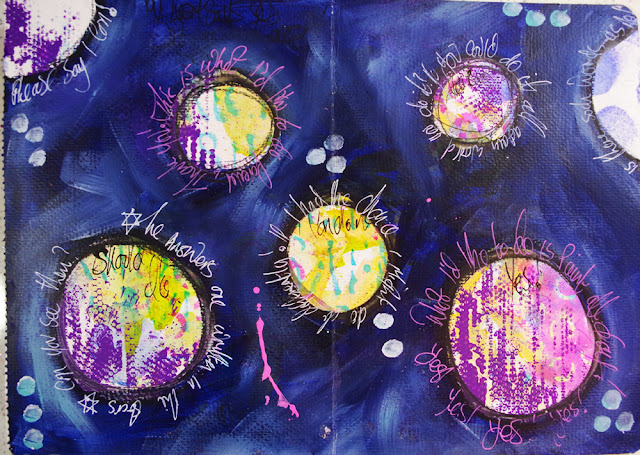
If you could do it all again, would you?
I love this idea of writing on the page, using paint and stencils, and then covering 80% of it with a dark paint and only leaving circles. I like the idea of writing something down, getting it off your chest, then painting over it. Art can be so therapeutic!


Our instructed page.
We were working blind on this one, we were all told to do something, one instruction after the other.We all interpreted the instructions in so many different ways. It was a brilliant exercise.  We all did so many different pages, it was wonderful.


We bound all the pages into a book, I'll cherish it forever, I love it so much.  I had such a great time. I can't wait to put into practice all that I've learned.  Thank you Dina.

Here's a pic of Dina and Ali (Ali will kill me for putting this picture up), but I love it, it sums them both up.
The cheeky twosome!


 Well if you've made it to the bottom of this post congratulations, I bet you've got no more tea left!
You deserve another biscuit for getting this far.
Thank you for popping by.
I'm off to get more paint under my fingernails!

Tara Michelle xx

Friday 22 March 2013

Weeds can be loved for Creative Expressions

I've been a poorly blogger hence the missing posts for a couple of weeks. But the good news is I think I'm back on the road to recovery, and therefore back on the blog!  I have lots of crafty things to post. So watch this space!

We've been given a bumper package of goodies from Creative Expressions this month and I have a head full of ideas to make with them. Here is my first using the wonderful new stencil from That Special Touch - Daisy Silhouette. I've used Dylusions Inks through the Daisy stencil on a book page, I love that grungy speckled look. I edged the page with Peeled Paint and Vintage Photo Distress Ink, then got the sewing machine out and ran a straight stitch around the edge twice.


I backed the book page with black card and stamped out a sentiment onto white card and cut it out. I then edged the words with Vintage Photo DI, and then edged it again with a black Adirondack Dabber.


I wrapped the bottom of the book page in string and attached a small garden trowel charm.  


 Keep your eyes peeled for some exciting news going up on the Creative Expressions blog and Facebook page next week, it involves blog hops and lots of prizes!

Have a fantastic weekend, mine is going to be very exciting, but I'll tell you more about that next week!
Ta ta
Michelle

Monday 11 March 2013

Pan Pastels tag book with Kate Crane

A while back I went on a Pan Pastels class at Art from the Heart taught by Kate Crane. I've had my eye on Pan Pastels for ages and wondered what they were like to use.  I've used chalk and oil pastels for many years and wondered if Pan Pastels were really all that different.

They are different, their pigment is so rich and vibrant. My chalky pastels never gave me this depth of colour ever. My oil pastels did, but I like the dry feel of the Pan Pastels, and they are great to stamp onto as well. Yes I had fallen in love with the Pan Pastels.

This is what we made, a gorgeous tag book. I meant to blog this as soon as I came back, but something always crops up.


We used Tim Holtz Classic Favourites & Blueprint stamps on the front of the tags. Stuck them to mount board then cut around them and stuck the book print to the back. I used a little bit of orange and dark green distress ink around the tags and edged them with a black Adirondack Dabber.

We also used a bit of moulding paste here and there for some texture. Kate suggested putting some rivets in here and there too, but I ran out of time and didn't use any, but they would have looked amazing.


I did use the blue Pan Pastel to colour in my world, but I didn't fix it (I could've just used hair spray but I forgot) and some came off, so I recoloured it with my chalk pastels which seem to work well.


They are really yummy to use. I need to play with them again. 
Have a good week.
Michelle x

Friday 8 March 2013

Hanging Art House for Creative Expressions

I really fancied making something that I could hang up using my Art House stamps this week from Creative Expressions. Here's my little Art House hanging, with its ultra thick embossing powder finish.


I started off colouring my house with TH Distress Markers


I stuck the house onto chipboard then cut it out. Then double embossed with ultra thick embossing powder, for a nice glossy finish. I punched some holes in the house on the top and the bottom using my Crop-A-Dile and fed some ball chain in the bottom and a key chain on the top. 


I used the TH Distress Markers to ink up my compass stamp, then spritzed it with water and stamped it onto my card, (love the grungy compass), then stamped the sentiment with black Archival. I stuck this to some chipboard and cut out the sentiment. I also double heat embossed clear ultra thick embossing powder on the front and waited for it to cool before making my holes to attach it to the house.

I also attached a TH metal key hole embellishment with wire to finish off the hanging base.


I don't use my Distress Markers nearly enough, I love this effect!
Mental note....I must use them more......
I'll be making a canvas this weekend, what will you be getting up to?
Michelle xx

Wednesday 6 March 2013

March #3 Art Journal fun with PaperArtsy - Dina-esque

A while ago I was blissfully going through life making cute cards and playing with glitter and gem embellishments, until I stumbled upon Dina Wakley's blog. Oh what a wondrous sight! A colour party for the eyes! I kept going back and further back through her blog posts and I had a eureka moment. What in the name of Van Gough was I doing?!!! I had been to art college when I was 17, I loved acrylic paint. 

This was a massive wake up call. Dina awoke my sleeping artist. But not only that, Dina had lots of links to other blogs I had no idea existed. It wasn't long before I replaced my jars of flower embellishments with pots of paint. 

Below is a sneaky peek of my Dina-esque inspired journal page using PaperArtsy Fresco Finish chalk acrylic paints, Crafter's Workshop stencils and the new PaperArtsy EclecTica3 stamps.

Please pop over to the PaperArtsy blog to see my step by step and my finished page in full.

This is my page after I used the stencils. I love all that colour.


Here's the sneak of the finished page.


Next month is my last month on the PaperArtsy Guest Designer team, so I'll have to make it a special one.
I hope you've had the chance to get out your paints this week and have a dabble with an art journal.
Once I caught the bug that was it!

Have a great week.
Michelle x


Tuesday 5 March 2013

March #2 Art Journal fun with PaperArtsy - Old Doors


One of my favourite subjects is history, and I have a thing about big old Medieval doors, they have to have big thick chunks of gnarly old wood and massive square headed nails! I feel like I just want to touch them.  I want to put my hand on the door to open it in the very same place someone else would've done 600 years ago.

So when I saw this big old door stamp from PaperArtsy I just had to get a journal page done of my obsession. I surely can't be the only one who likes this?....however, I've never come across anyone else who likes big old doors too! 

Here's a sneaky peek at the 2nd art journal page I've done for PaperArtsy this week, my big old door!
If you'd like to see more, then please pop over to the PaperArtsy blog to see my step by step and  the finished page in full.


I'm so excited to show you my next project tomorrow.
One of my favourites!
Have a good evening and whip out those journals and get messy, I will be.
Michelle x

Monday 4 March 2013

March #1 Art Journal fun with PaperArtsy - Friends

I've bought an tiny little old ledger from ebay. It's the most perfect size 8" x 5", I love it. I have lots of different sized journals which I dip into now and again to do a page. But this little journal is the only old one I have and the paper quality is so nice and smooth. When the page is painted and dries its lovely to touch, its kinda cold and smooth....does that sound mad?? :)  


I've had a very exciting time playing with the new EclecTica3 PaperArtsy stamps designed by Sara Naumann, they have a distinct art journalling theme to them. I had made 4 journal page samples for the PaperArtsy stand at the Birmingham Stitches show. So this set me off playing in my journal again. PaperArtsy stamps are so great for art journalling anyway, and I was not stuck for any ideas.


I love this sentiment I knew I was going to use it at some point.
Here's a sneaky peak of my first project for this week. Hop along to the PaperArtsy blog to see the journal page in full.


one more


I hope you'll join me for the rest of the week for more inky painty shenanigans
If you'd like to leave me a comment that would be very lovely :)
Thank you
Michelle xx
Related Posts Plugin for WordPress, Blogger...