Tuesday, 27 November 2012

Hanging Trees Christmas Decoration

This hanging decoration has kept me busy, by trying not to think of the rising water levels in my garden and watching it creeping ever closer to the house. Last night it was about 5ft from the back door! The rain has finally stopped this morning, but it'll only take one more big downpour to reach the house. Fingers crossed it will recede.

While I was waiting for my next design team stamps from Creative Expressions I thought I would make one more project from the wonderful Let it Snow stamp set. This is hanging in my kitchen and it looks fab, (you can just see my huge spice rack in the background, oh yes... its a thing of beauty).

I picked up the white wicker ring from the florist and adorned it with ribbons, bells and 3D trees.


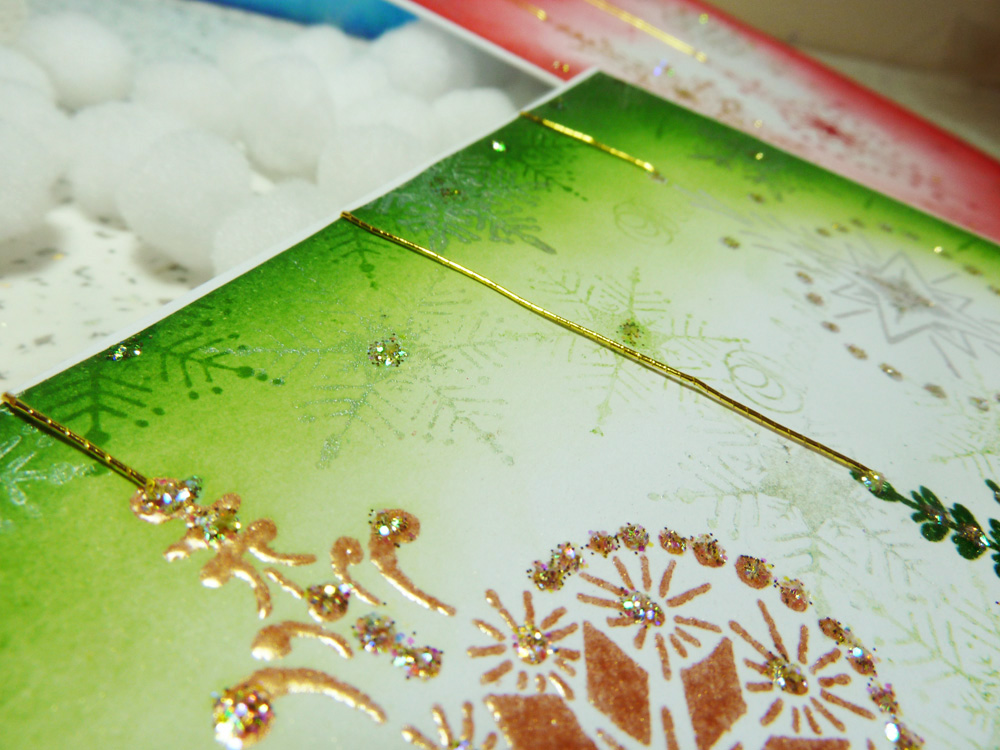
Here is a closer look at one of the stamped 3D trees. I hung 2 snow charms (back to back) from the bottom to gave the trees a sturdy hanging weight.


Surely now I can put all the other decorations up???  Yes??
Michelle x

Thursday, 22 November 2012

Christmas Dylusions & Holidays are coming!

Here's a Christmas journal page I made for a challenge Dyan Reavely set on Facebook last week. It's also tying in with a Christmas theme over at It's Crafting Time this week. Pop over and have a look at our very talented design team to see what they've made. 


I made a background using the London Blue and Vibrant Turquoise Dylusions ink just sprayed onto the page and then closed the journal to soak up the ink on the opposite page.

Then I use the large snowflake mask to spray water on the page and dampen off with a kitchen roll. This is Dyan's fab bleaching technique and works a treat on the snowflakes. It makes them look snowy white too, gorgeous. Then I used the small snowflake mask to spray the blue and the turquoise in small random places. I sneaked in a flying Santa sleigh stamp too from Inylicious!
 

I stamped the tree using the Christmas Accessories Dylusions stamps in various, green, brown and black  Archival inks.


I've outlined some snowflakes with a white Gelly Roll pen. I used a Tim Holtz Christmas music stamp with bright gold Distress Stain over the top of the page too. 


I used a mix of Dylusions stamps for the Snow King, Bits of this (skull head), Ruby Rainbow (body), Christmas Accessories (beard), and I drew the crown. I finished it all off by doing the black border and writing Ho Ho Ho and other Christmas related words in the stripes. I also got dotty happy with liquid pearls all over the page. Love these gorgeous beads of shimmeryness!


***********************************
On another note, I saw this last night.
I was on cloud 9!   How cool is this!
It will be coming to a town near you, check out the tour dates. (I think the website keeps crashing with all the traffic, but you should still be able to see a list).


But beware the roads leading up to it, will be gridlocked, park up and walk to it!
Holidays are coming, Holidays are coming!

Tuesday, 20 November 2012

Christmas Bunting

Everyone likes handmade bunting, and when it's Christmas bunting.. well that just makes it even better doesn't it! These last few weeks I've been making Christmas decorations left right and centre. I can't wait to decorate the house and use them all, it'll be nice to see my handmade crafty items put to good use.

The stamps I've used here are the "Let it Snow" stamp set from Creative Expressions. I've also used the stars from the TH Christmas Time stamp set too.


Oh it looks so Christmassy with the fairy lights on!


First of all I've used the back of a Tim Holtz Christmas Memories kraft sheet. I die cut the bunting triangles. Then used white Cosmic Shimmer embossing powder on the stamped images.


My newest crafty purchase is the Sissix Bigz Word Play alphabet die. 
The die cut letters were the perfect size for the bunting.
But they did need some jazzy colour,....... that's coming up!


Before I put the colour on the letters, I distressed the edges of the bunting with Vintage Photo DI.


Look at these shiny bad boys!


I punched holes into my bunting triangles and threaded red ribbon and jingly bells though them, I then linked them all up to make the bunting.


I really love those letters and the bell in the middle of the ribbon.
I've dotted some areas of the bunting with glue and stuck down some Cosmic Shimmer mica flakes.
They catch the light, which adds a little bit of sparkle.


I really wanted to leave these up!
It won't be long till they go up for real.

Michelle x

Sunday, 18 November 2012

Little Thank You canvases

I popped into the Great North Papercraft Extravaganza (GNPE) in Harrogate after a class at Art from the Heart in October.  I heard that Paper Artsy had a stall there so I went to grab myself a bargain. I picked up these teenie tiny canvases which I've painted and stamped up to say thank you to two crafty friends, Anne (Redanne) and Trace (inkypinkycraft).

Anne sent me a lovely Christmas tree stamp I said I liked on her workdesk, so I sent her the pink mini canvas. Trace and I did a swap shop of goodies from our stash. Trace sent me a lovely enamelled hanging heart with her parcel and I sent her the blue mini canvas below.

I enjoyed working in the small scale as it makes you focus on the tiny details. The little heart and crown is from Tim Holtz grunge board elements.


I painted up the canvases with acrylic paint, then painted around the edge in metallic purple and blue. 
I blacked the edges with black Adirondack dabber. 
I used a honeycomb stamp and a flourish to create some layers on the canvas. 
I've used some cosmic shimmer embossing powder on the hearts and Tim Holtz Walnut Stain distress embossing powder on the crowns. 
I've used my favourite little accessory the Beadazles and some Cosmic Shimmer mica flakes too (the mica flakes are my new obsession at the moment), love those shiny things.
I just wanted to say Thank you very much xxxxx

Monday, 12 November 2012

Wiry 3D Christmas Tree Tag

I've been away from my crafty desk this week, with everyday life getting in the way of my crafty mojo-ness!
I'm practically rocking back and forth, going crazy not being able to use my distress inks and stamping.

Well I'm back I tell you, back where I want to be, with dirty inky hands, long may it last!
I've got a new camera too, so I'm just feeling my way around that. I could do with a lesson in using my digital SLR, I've forgotten everything I learned at college about photography. 

I'm really enjoying using these new stamps for the Creative Expressions design team. The ones below are the Let It Snow stamp set. I just love that Christmas tree and the reindeer. 


I started off with a tag I had inked up with blue distress stains and Cosmic Shimmer mists, hence the lovely blue drippage, then I splatted it all with white gesso. It really looked Christmassy at this point. But I wanted more colour!


Then I stamped it with TH crackle stamp using a green metallic acrylic paint, distressed the edges with Rusty Hinge DI,  and darkened the edges more with Black Soot DI. I used a stiff dry paint brush with a bit of white gesso on it to run streaks up and down the tag, which gave it a weathered beach kind of effect. 
Loved this with the blue and the rusty hinge colours.


I used the Let it Snow stamp with Picket Fence Distress Stain and stamped that around the tag, then stamped some flourishes here and there too. I pleated some music Tissue Tape along the bottom of the tag, for a nice little frill not thrill!. 
I've added some sparkly gold texture from the Cosmic Shimmer mica flakes too, they are gorgeous, love them!

I used blue and green alcohol ink on the numbers, the pin and the Christmas token to match the green wire on the tree and the baubles.


I made the tree using Cosmic Shimmer Bronze lustre embossing powder. Stamp both sides of a tree shape 3 times then cut it out. Then do another one without one on the other side (this is your base). Fold the other 3 in half. Cut one  in half, this is your centre one. Use the other 2 folded trees to glue (down the centre only!) to your base and glue the centre one in and leave to dry. Once dry you can bend all the layers into the right position. I used a poky tool to make holes to thread the wire through the layers of the tree. Don't forget to add some beads while your threading to make little baubles.
I am well and truly into the Christmas spirit now, especially as the Coke Cola Christmas truck advert was on the TV on Saturday, now I know Holidays are coming!.
Michelle x

Tuesday, 6 November 2012

Ordinary Candle Holder to Sparkly Christmas Candle Holder

Everyone who knows me knows I'm a big Christmas fan, and if I can turn an ordinary everyday item into a Christmas decoration, I will!

Here is a large glass candle holder, very nice and elegant.......but Christmas is coming and it can't just sit there being all elegant and having no reference to the festive season can it! 
So I decided to use my gorgeous Heartfelt Creations bauble stamps, from Creative Expressions to add some Christmas cheer to my candle holder.


What a transformation! Not ordinary any more.


I stamped the candle too.


It looks so pretty with the heat embossed baubles around the glass.
I used a mixture of white and gold embossing powder.


I'm really pleased with how this has been transformed. It's unique and I made it.
I love that feeling.
Make something that makes you happy today.
Bye for now
Michelle x

Creative Expressions are recruiting. They're looking for a Regional Accounts Manager to cover the Midlands and South East area. If you're interested and want to find out more information check their job vacancies page. 

Saturday, 3 November 2012

Halloween Antics 2012

Halloween has always been a big affair in our house, because it's my son's birthday on the 31st. It's great because I'm never stuck for a theme for the party! Although the party is much less chaotic these days now he's 22 but we still carve our pumpkins, get dressed up, decorate the front of the house and get tons of sweets in to hand out to the kids. The kids love it, they always say "it's propa mint this house!"

We like to make the effort, it's a whole lot of fun. Here's our effort for this year.


Here's the big spider web on the front of the house!


Some of our snacks, hotdog mummies.
We used szechuan pepper corns for eyes.


Me and my ghost


I've been trying to find our pictures from previous years, and I found these two from 2010.
This is when Sack Boy from Little Big Planet was all over the place.


And a blog post wouldn't be the same without some crafting now would it!


Well it's been a very busy week, with two important birthdays and a works night out, now it's time to get back in the craft room and get into the Christmas spirit.

Hope you all had a great week, if you got up to anything spooky this week, tell me about it?
mwahh ahh ahh ahh
Michelle x

Thursday, 1 November 2012

R is for Retro

I'm a child of the 70's born 1971, I have many fond memories of playing outside, with my flared trousers on and my incredibly long collars! I remember the heatwave in the summer of 1976, and the Silver Jubilee street parties. The music was pretty awesome too. When It's crafting Time said that this week's design team theme was retro it just conjured up happy memories of always playing outside and not so many rules as we have today.

70's retro colours to me are brown's, mustard yellow, red and blue, and here they are on my altered Decopatch letter R for Retro.


I've used Tim Holtz Cirque stamp set, they all work brilliantly with this theme.
I've also cut out the letters from a Tim Holtz Seasonal Paper stash page to spell Retro.


I have to thank Kate Crane for the black liner I used around the letters. Kate kindly gave me a black Stabilo aquarellable pencil after using one in one of her classes at Art from Heart. Its brilliant because you can rub it with your fingers to make a grungy grubby black shadow around things or use a fine paint brush with a little bit of water to blend the black into the edges, which I've done here.


I've also used one of Tim's idea-ology metal sentiments dabbed with blue alcohol ink and rubbed with white gesso in the letters to make them stand out. I've also used music note tissue tape on the inside edges.
It's far out man!
M xx

Tuesday, 30 October 2012

Beautiful Christmas Baubles

These Heartfelt Creations stamps are so beautiful and I'm so proud to be showing you how I've used them for the Creative Expressions Design Team this week. I'll be making crafty projects for November using these baubles stamps and the Creative Expressions "Let it Snow" stamp set too. I'm looking forward to seeing what we all come up with from these wonderful Christmas stamps.

I wanted to show how they look with different colours, and I really like how they've turned out. You can't see the sparkles so well on these pics but they shimmer lots and they look very Chrismassy.


Each card has a coloured centre bauble with the same colour inked around the edge of the card.
I've heat embossed each bauble with a gold and a silver bauble on each card, and then dotted them with the Stickles glitter.

Here's a close up of the gorgeous Cosmic Shimmer Persian Sea Aurora embossing powder, it has mica powders in it, so it has a beautiful metallic shimmer. The gold and the silver are also Cosmic Shimmer's embossing powders.


I've also used some silver acrylic paint which I've stamped onto the cards to add some subtle silvery highlights.


The bauble strings are made with gold cord fed through the eyelets of the baubles.


The inside of each card has the 3 smaller baubles and a Merry Christmas greeting stamped in the same colour as the ink on the front.


I'm well and truly into the Christmas spirit, drinking mulled wine and waiting for Christmas 24 to start on the movie channels! (Christmas films shown 24/7 and starts on the 1st of November).
Is this wrong?
M xxx

Sunday, 28 October 2012

Hiding Pumpkin Cats Stampotique card

Well the weather has turned decidedly colder this week and I feel the winter chill fast approaching. It was time to buy the de-icer for the car and fish out my hat and scarf for the cold dark drive to work every morning. The clocks went back last night so the mornings will be lighter, but not for long. I'll be going to work in the dark and coming home in the dark soon, so I'm pleased I have daylight bulbs in the craft room to keep me chirpy through the winter months until Spring arrives.

If I keep making cheeky little cards like this though I'll be a happy bunny until the sunshine is back.

I'm entering this card into the Stampotique challenge this week where you take inspiration from one of their design team members and my inspiration for this card, you guessed it, would be very reminiscent of Kate Crane's style.


I love these Stampotique stamps, the pumpkins just make me smile lots and the cats just look so cheeky.


I love seeing them hiding behind the pumpkins


 I've used Dylusions inks, Stampotique's (pumpkins and cats), TH spider-web, The Stamp Man's spiders and Artistic Outpost's hanging bat stamps. I used Gold Ice Stickles on the spider-web to make it glisten with dew.

This card just makes me feel happy.
Have a great relaxing Sunday.
Michelle x

Thursday, 25 October 2012

Friends are like stars....

I made this canvas for my best friend's birthday, we've known each other since going to Uni together. She now lives nearly 100 miles away and I miss her loads, but we try to meet up at least 5 or 6 times a year. So the sentiment on the canvas really sums up our relationship. She's very creative too so I know she'll love this.


I've used the free star stamp we got in Craft Stamper last month and another free star stamp from Craft Stamper from last Christmas I think. There is also another hanging star stamp on here too, not sure who made that one. 


I've used some TH heart and wings dies and some chipboard stars too for some 3D interest!
I used TH Newsprint Letters, covered in acrylic paint.
I've also sneaked in some Beadazzles in little areas here and there.


What canvas wouldn't be complete without a bit of drippage?
This time its Tattered Angels Teal glimmer spray dripping down the canvas.

When you get your eye in, you can see I've used lots of stamps and gesso through stencils and distress ink through stencils too.
You know me I like lots of layers!
Looks like we might see some blue sky today instead of just thick white cloud.
Fingers crossed xx

Related Posts Plugin for WordPress, Blogger...